how to weave twill patterns
Our pattern bars let you weave twill in no time, and understand how the structure works! Here are a few tutorials to help you learn the basics and create a sample project.
twill
✳︎
diamond
✳︎
twill
✳︎
diamond
✳︎
twill ✳︎ diamond ✳︎ twill ✳︎ diamond ✳︎
easy twill weaving tutorials
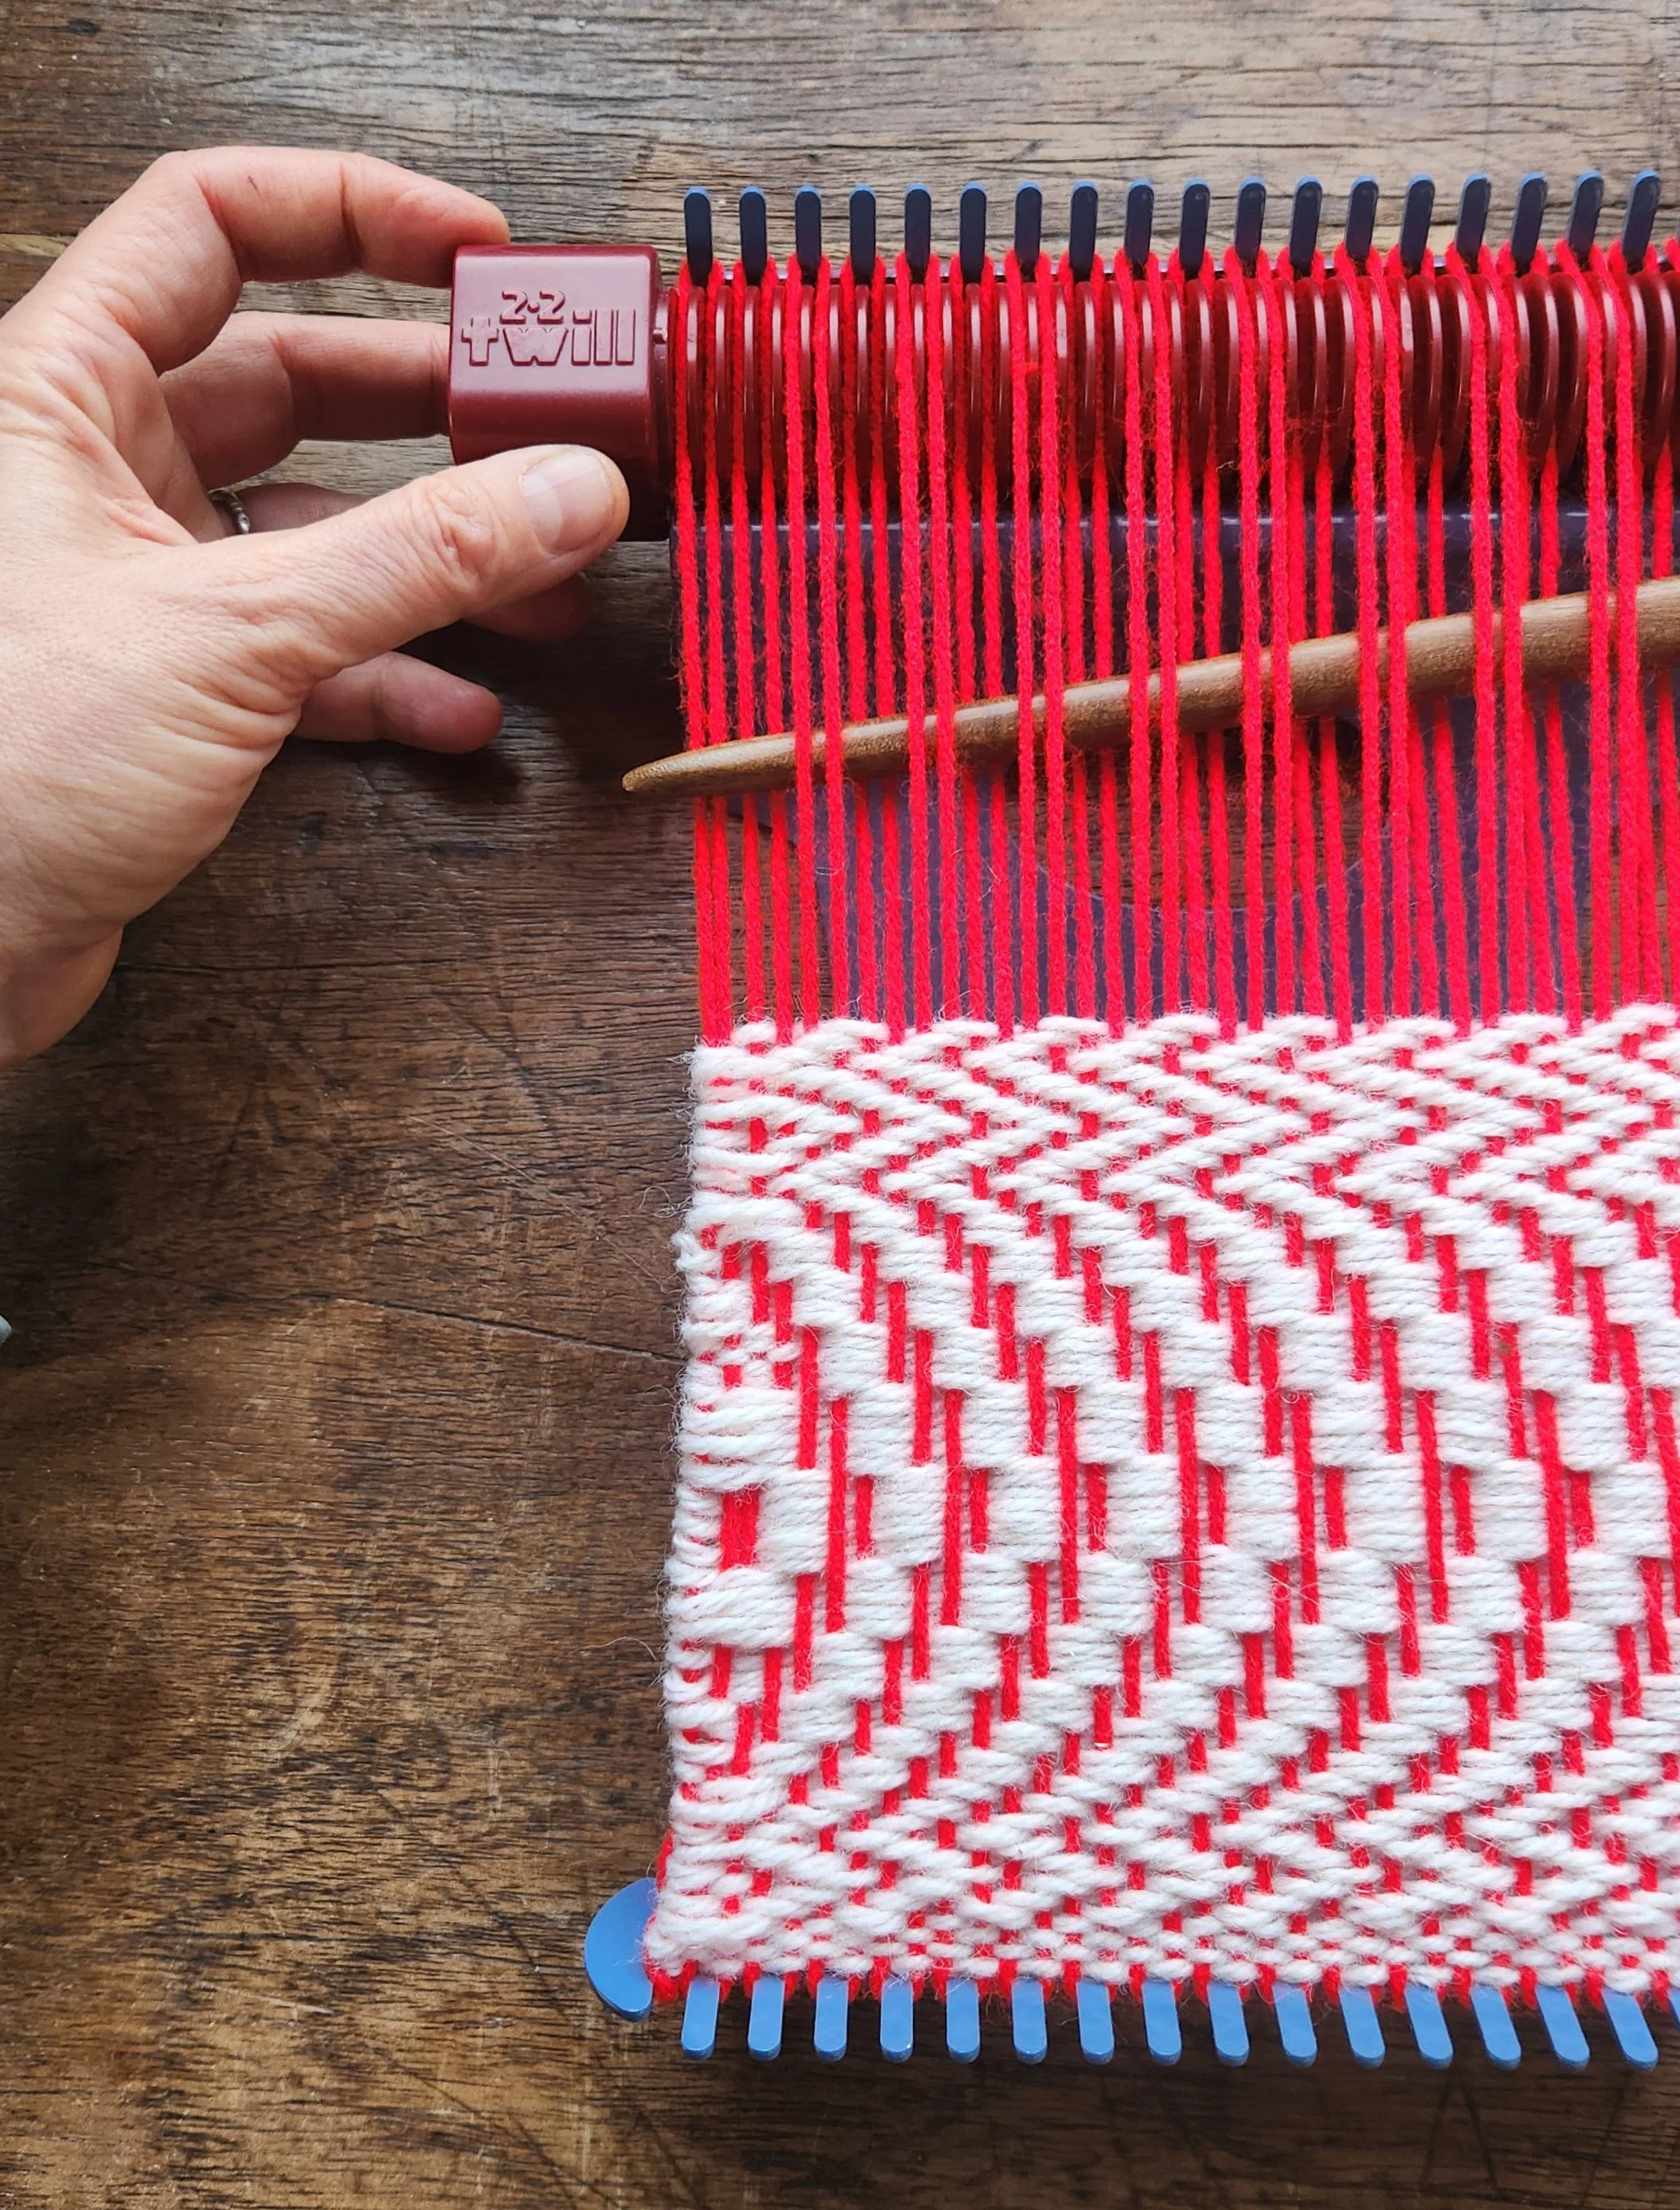
On our looms you can use the twill and diamond bars to make 2-2 twill, a simple diagonal rib. As you rotate the bar and weave rows, each position of the bar makes one row of twill — it’s like one “lift” on a floor loom. By varying the number of rows you weave in each position, or the direction you rotate the bar, you can create variations easily and intuitively. The diamond bar makes a pattern called diamond twill, with half of the diagonals slanting in one direction and half in the other.
In these videos, we show you how the bars work to create basic twill patterns, then walk you through sample projects. NOTE: If you’re new to our looms, learn the basics in our getting-started videos here.
twill and diamond twill patterns, step by step
Gather materials. Warp thread (anything relatively thin and strong, but thicker than sewing thread, yarn is fine if that’s what you have), medium thickness yarn for weaving, tapestry needles, and beater comb (hair comb or fork will do!).
Warp your loom and weave a few rows of plain weave at the bottom. (For plain weave videos, see here.)
Insert the twill or diamond bar. The words go on the left, numbers on the right right. Slide under the warp threads, up to the bump at the top of the loom, align with the warp, and push over the bump into place. More deets in the video above.
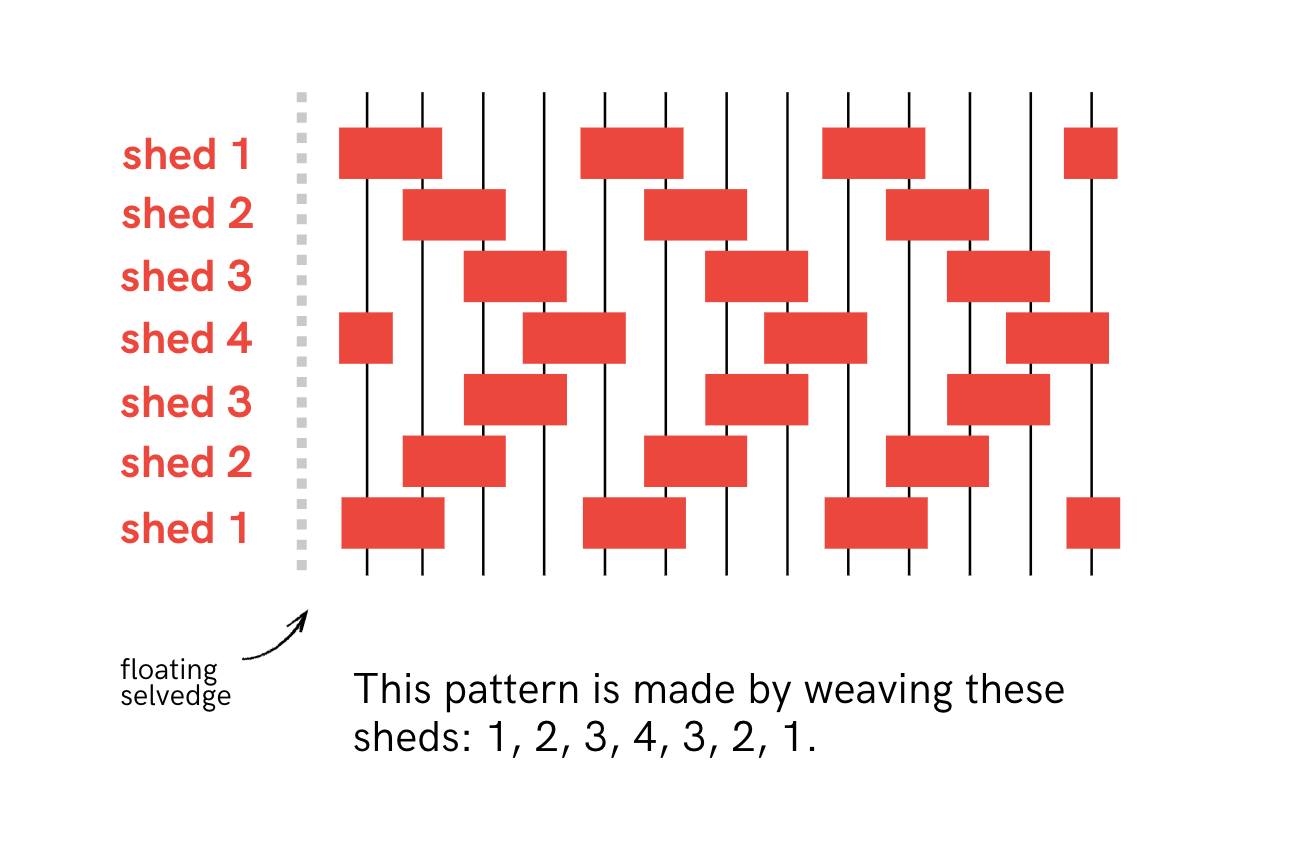
Important! Using the floating selvedge (applies to all pattern bars): always go under the very first thread on the way into a row, over the very last thread on the way out of a row — for every row you weave. This prevents gaps at the edge when weaving patterns.
Weave a row, make a small hill of slack, beat down, then rotate the bar to the next number.
For the twill bar, the sequence goes in order: 1→2→3→4→1… or reverse: 4→3→2→1→4… This creates the diagonal.
The sequence for the diamond bar is also 1→2→3→4. It makes diagonals coming together or going apart from both sides.
Making zigzags and diamonds. When you reverse the direction of the bar, the direction of the diagonals changes. Weave a few rows in one direction, then reverse for a few rows. Repeat. With twill, this makes a zigzag, for diamond, it makes an X or… a diamond.
Undulating twill. To make a curve, weave more than one row in the same bar position before advancing. Start with one row in position 1 (this makes it easy to remember but you could start in any position), then two rows in position 2, three rows in position 3, four rows in position 4, five rows in position 1, six rows in 2. Then reverse direction! Five rows in 1 again, four in 4, keep going down to 1. Don’t forget the floating selvedge!
Try out-of-order positions (e.g. 1, 3, 2, 4…) to create pixelated, quirky patterns — especially visible with a contrasting warp color.
sample project: zigzag twill weaving
Gather materials. Warp thread (thin/strong), thinner yarn for borders, thicker yarn for center section, tapestry needles, and beater comb.
Set-up. Warp your loom and insert the plain-weave bar.
Striped section. Weave four rows color A, then 3 rows color B in plain weave.
Switch to twill bar. Reposition any slipped warp threads.
Twill section. Weave 6 rows forward (1→2→3→4→1→2). Under in, over out of the floating selvedge every row.
Zigzag. Reverse the bar direction and weave 5 or 6 rows back. Repeat, with 5 direction switches total.
Final stripes. Swap back to the plain-weave bar. Weave two rows color A and three rows color B.
Finish top. Remove bar. Use ~24" of tail yarn to tie half-hitch knots across all warp threads. Watch the video for more info on the half-hitch.
Remove & trim. Weave in all tails, cut warp threads, knot corners, trim close. You can also weave the tails in when beginning a new color, as you go along, to avoid doing it after the piece is off the loom.
sample project: diamond twill weaving
Gather materials — warp thread (thin/strong), thinner yarn for borders, thicker yarn for the medallion center, needles, and beater comb.
Warp the loom and insert the plain-weave pattern bar.
Weave a border — a few rows with the thinner yarn.
Swap in the diamond pattern bar and weave the first half of the medallion by rotating the bar in reverse (4 - 3 - 2 - 1 - 4 …etc) for ~22 rows.
Weave the second half by rotating the bar forward the same number of rows, about 22 — this creates the mirrored diamond/medallion shape.
Switch back to the plain weave bar and weave a matching border to balance the bottom.
Finish — weave in ends, then complete with half hitch finishing along the edges. See sample twill video for half-hitch steps.
Click on the image for printable instructions!